User Interface
Main Screen
The main screen of Open-iAPS can be divided into three sections:
| Status | Graphs & Statistics | Actions |
Status
The Status section shows your current insulin on board (IOB), carbs on board (COB), blood glucose, pump status, and looping status.
The looping indicator will be grey{.bg-secondary} if no data is present. It will be $\textcolor{#2ED258}{\textsf{green}}$ when it has been less than 5 minutes since a successful loop cycle. It will turn $\textcolor{#FF9F03}{\textsf{yellow}}$ if no loop cycle has been completed for over 5 minutes. If more than 10 minutes go by without a successful loop cycle, the loop circle will turn $\textcolor{#FF463C}{\textsf{red}}$. The section to the left of the loop circle shows you the approximate units of insulin left in your pump. If you’re using Omnipod, 50+ U means more than 50 units of insulin are left. Below the insulin left, you will see your pump battery status if you’re using a Medtronic pump and the days/hours left if you’re using an Omnipod.
Tapping the top of the screen will bring up a History screen with information on changes implemented by the most recent loop cycle. Tapping the pump status will bring you to pump settings.
Graphs and Statistics
The middle of the screen graphs your current blood sugar data and inputted carbs overlaid with Open-iAPS’s insulin delivery and blood sugar predictions.
Below the graph is the prediction line legend so you can determine the meaning of your prediction lines.
The zero temp ($\textcolor{#715FEF}{\textsf{ZT}}$) line predicts where your blood sugar would be if insulin delivery and carb absorption ceased. The $\textcolor{#2295FA}{\textsf{IOB}}$ line predicts where blood sugar would be if insulin delivery was ceased and carb absorption was minimal. The unannounced meal ($\textcolor{#FF8442}{\textsf{UAM}}$) line predicts how long blood glucose will continue to rise, to dose insulin accordingly. The $\textcolor{#FDC145}{\textsf{COB}}$ line predicts the effects of entered carbs on future blood glucose. For more information on prediction lines, see the OpenAPS documentation.
If enabled, statistics detailing your time in range, coefficient of variance (CV), and average glucose are displayed underneath these graphs. Tapping in this area allows you to change the time interval used to calculate these statistics.
Actions
At the bottom of the screen, you have five action icons:
Meal Bolus
The Meal Bolus option allows you to enter Carbs and bolus accordingly. If you have “Fat And Protein Conversion” enabled, you will also be provided the option to enter fat and protein content in grams.
Temp Target
The Temp Target icon allows you to set temporary blood glucose targets. The most common targets are a high target for exercise and a low target for meal preparation.
Bolus
The Bolus icon allows you to give manual correction boluses. Manually correcting is not recommended if you are using Open-iAPS’s SMB and UAM features.
Statistics
The Statistics Icon shows your statistical data in the app.
Settings
The Settings icon allows you to access your Open-iAPS settings. The settings screen allows you to adjust your configuration. Please see Configure for more information on each configuration option.
New Bolus Calculator
It’s hard to manually calculate the right bolus for a meal. The carbs you eat are one thing, but to get the right bolus, you also need to consider carbs and insulin already on board, current glucose value, and where your glucose is heading. If glucose is heading low, should you still bolus, or wait? These considerations have been part of the bolus calculator for a while but have raised many questions. Because of that, a new bolus calculator has been developed by one of the community members and refined and tested by several users.
How to activate the new Bolus Calculator
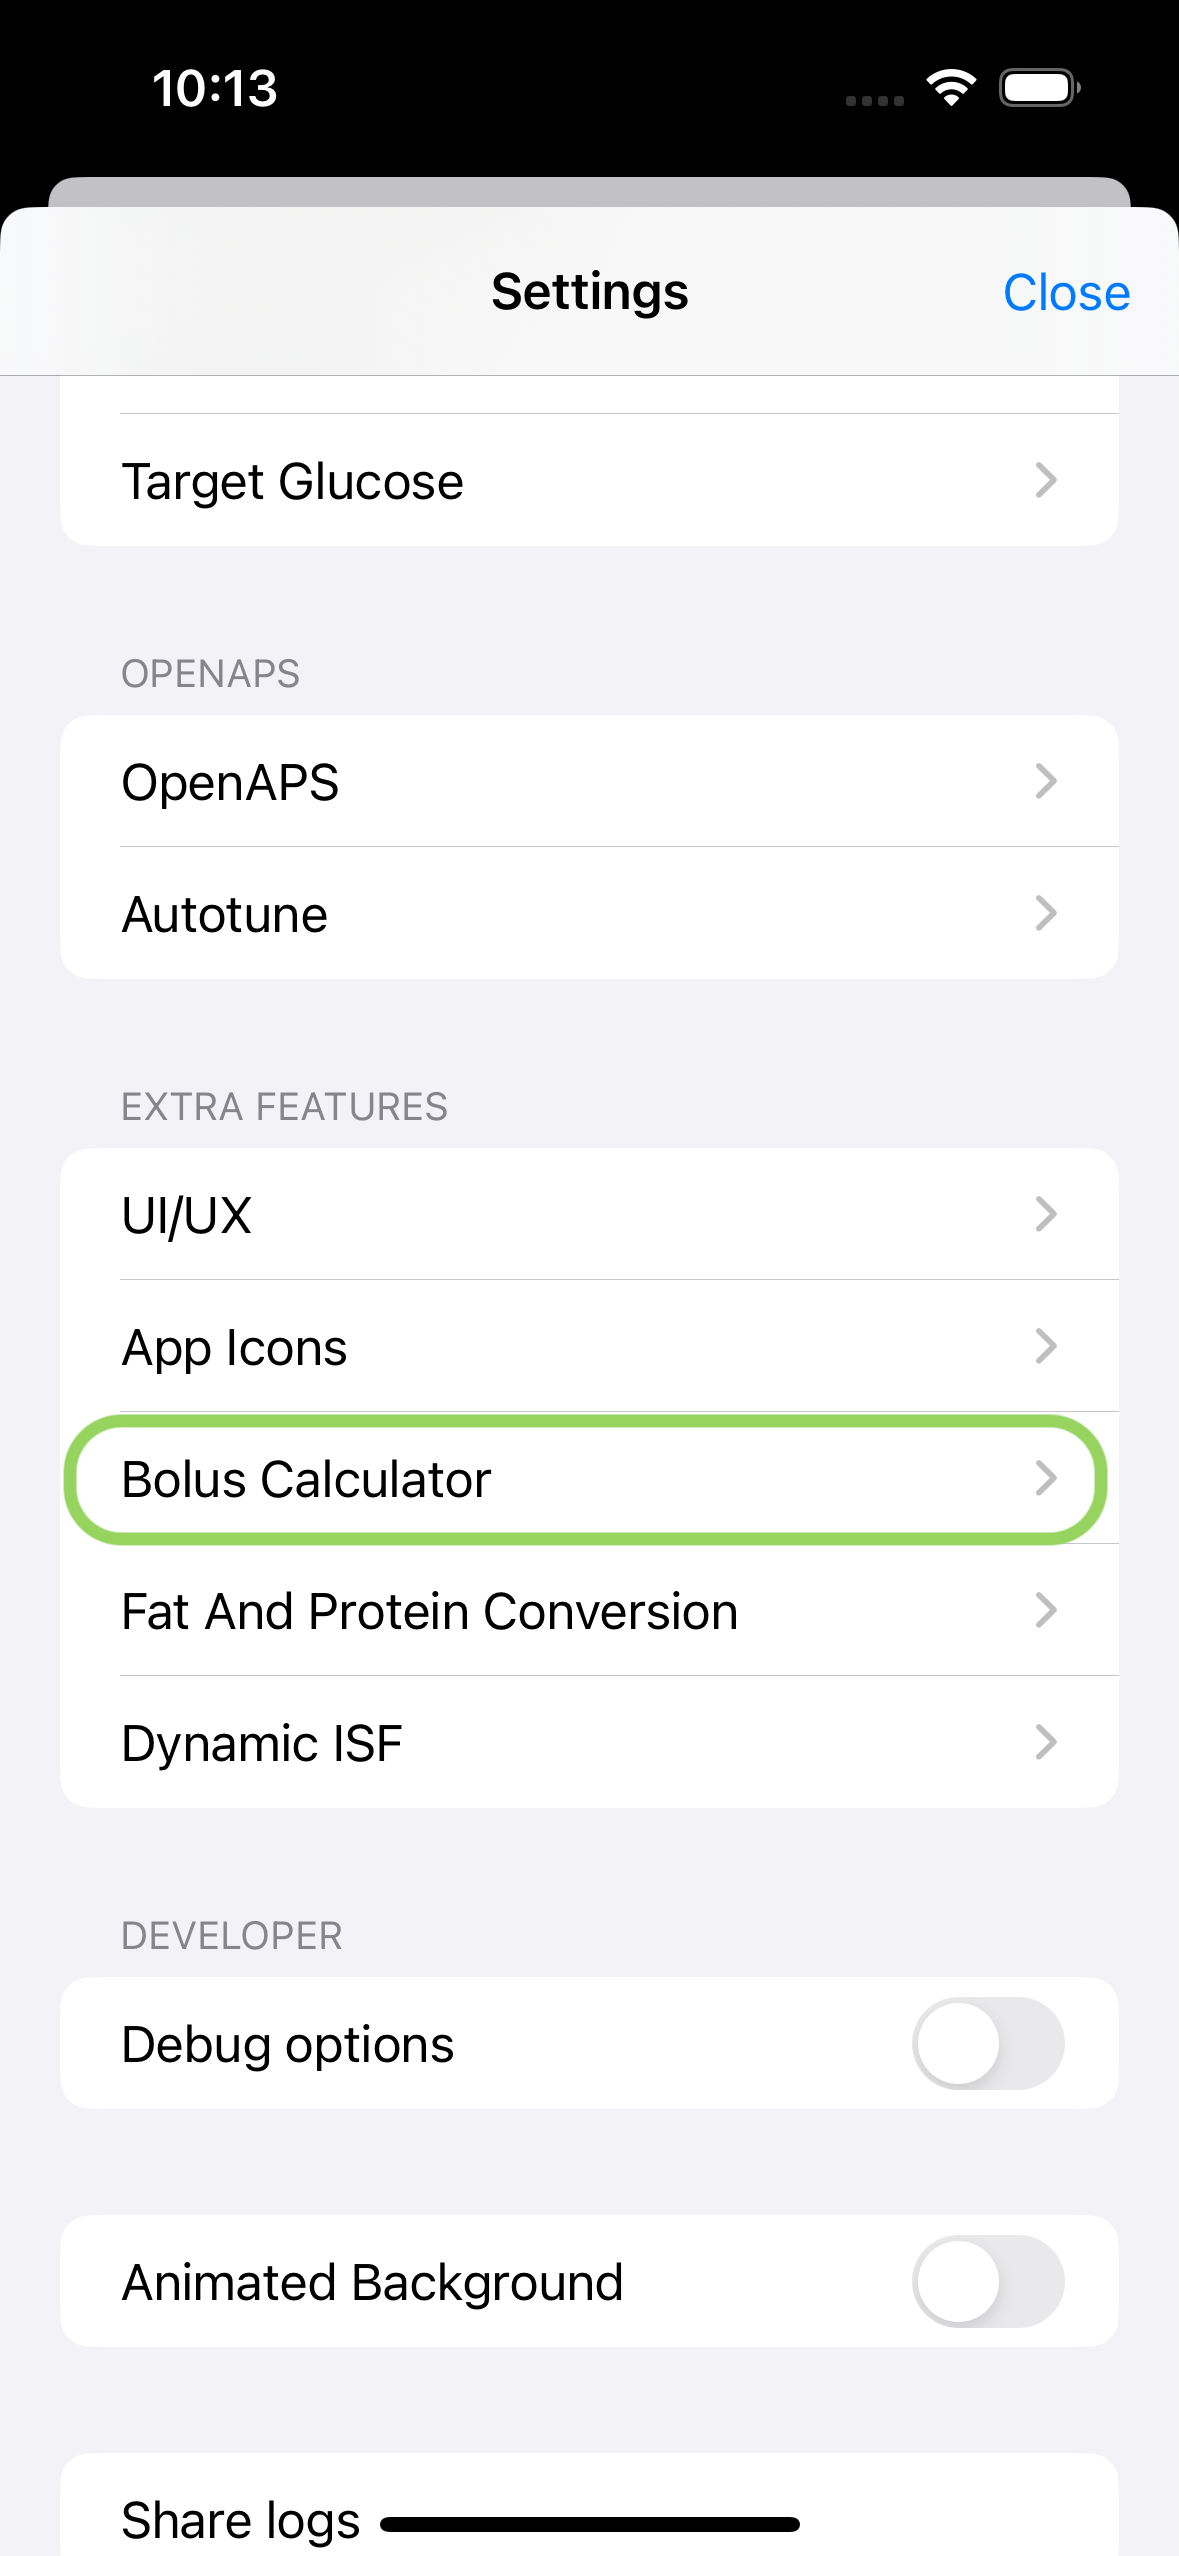
The new bolus calculator is not enabled by default. You need to go into Settings -> Bolus Calculator and activate it:
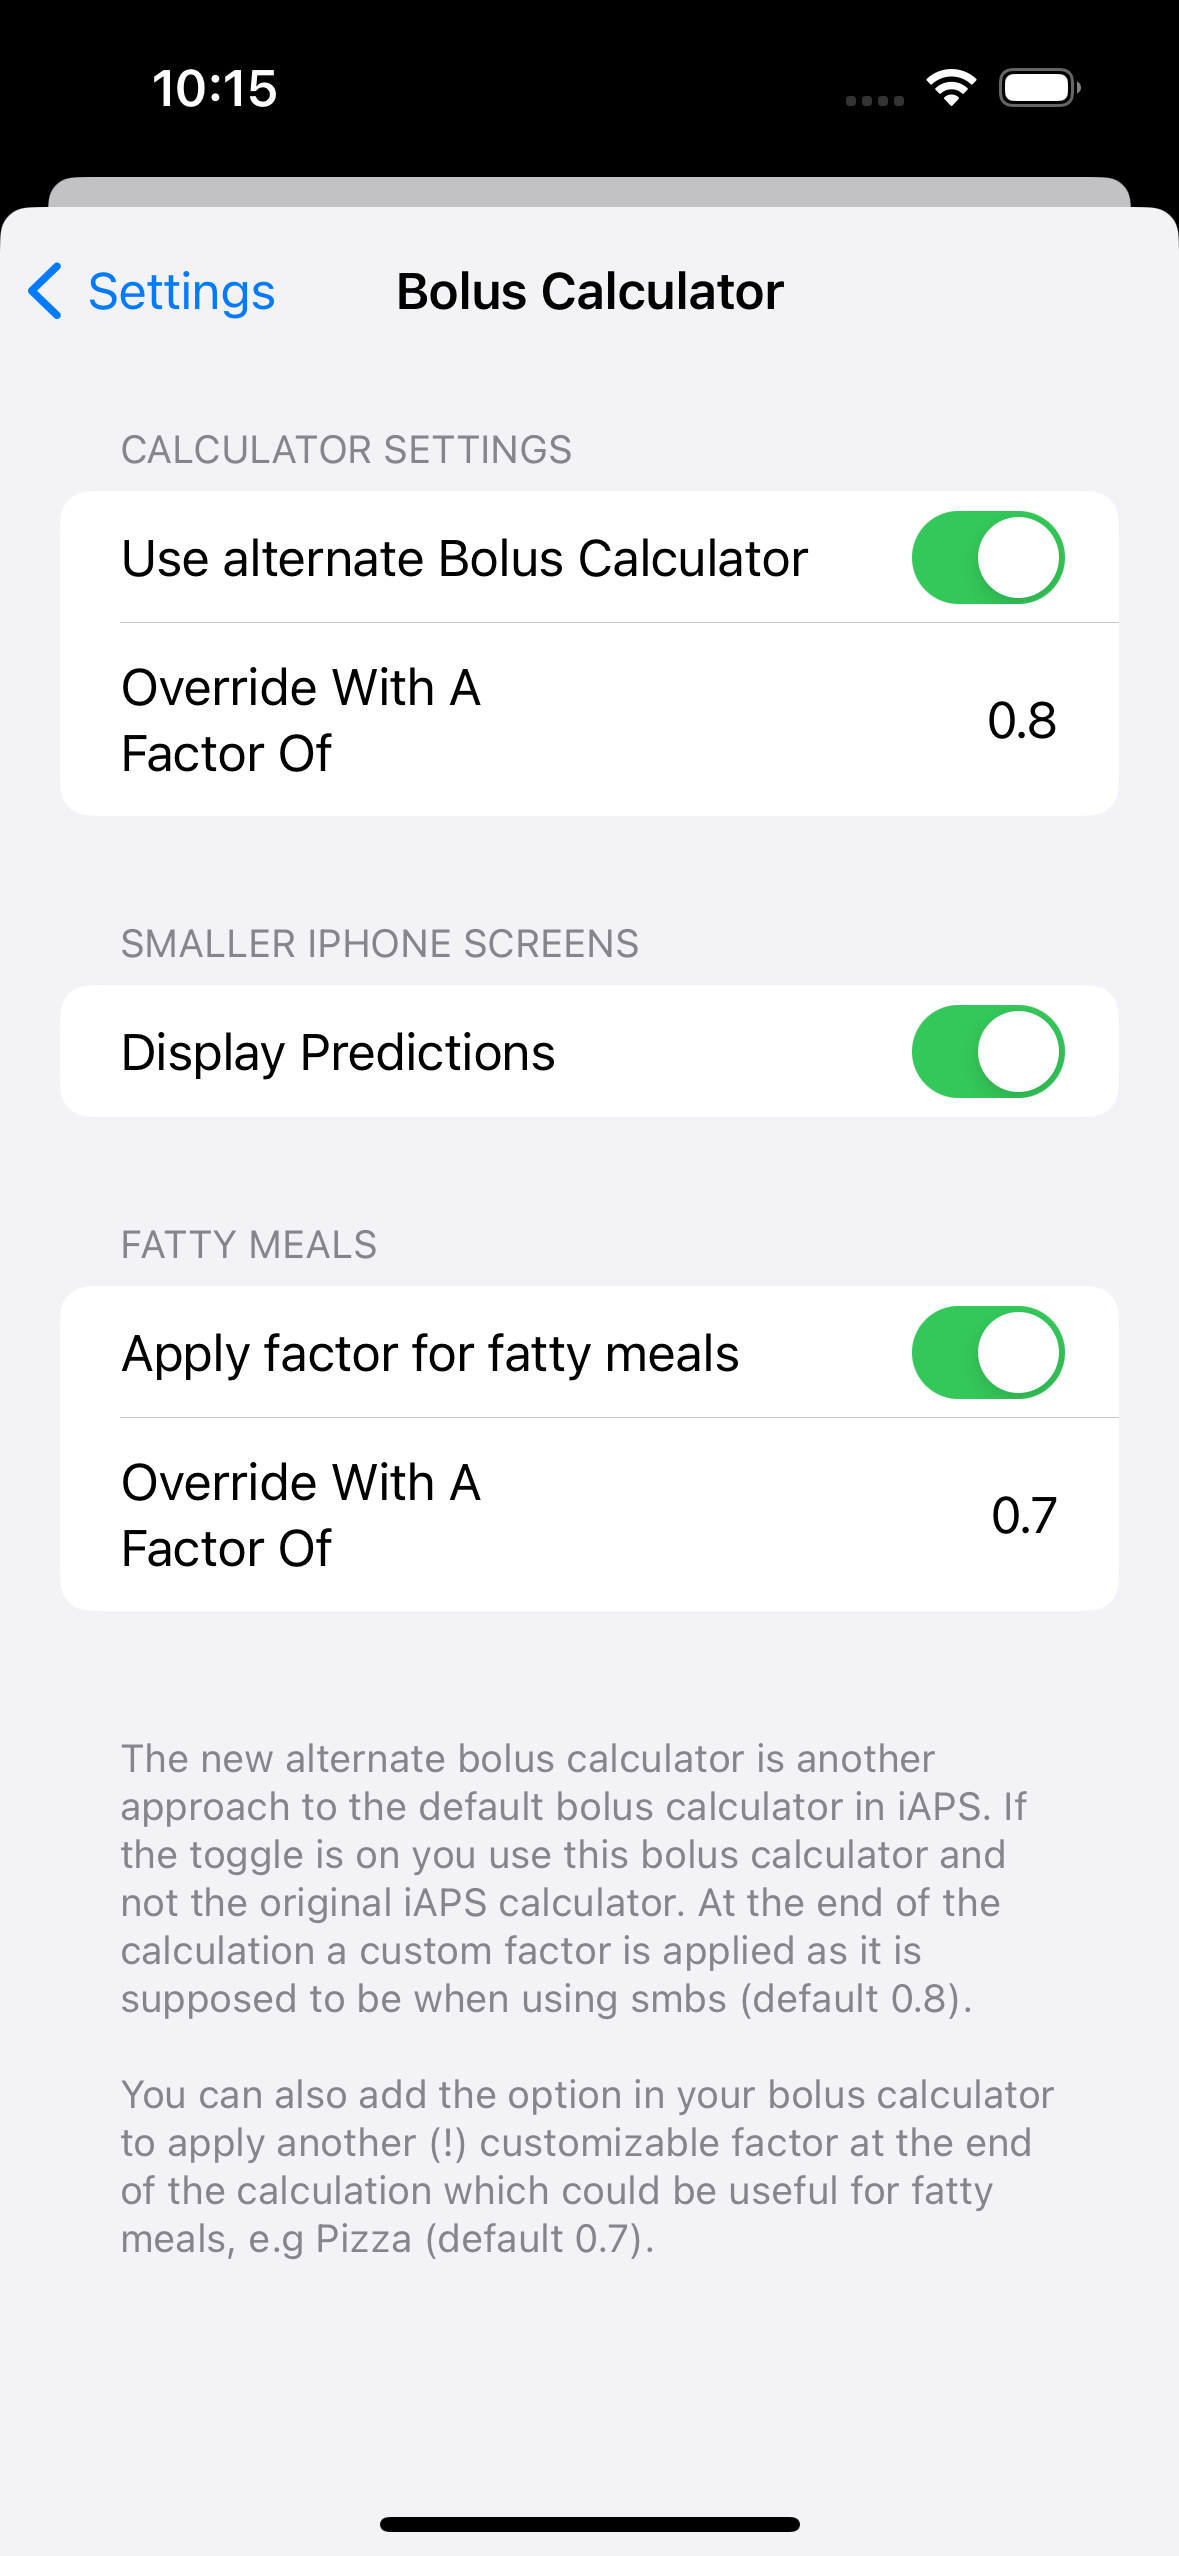
When you activate it you will see some new settings turn up. The intended behavior of any APS-based system is to bolus a partial amount up-front and then let SMBs handle the rest depending on your BG development. Read the explanation in the bolus calculator settings and then set your override factors. If you are using an iPhone with a small or low-resolution display, you could consider disabling the prediction lines in the calculator by turning off “Display Predictions”.
How to use the new Bolus Calculator
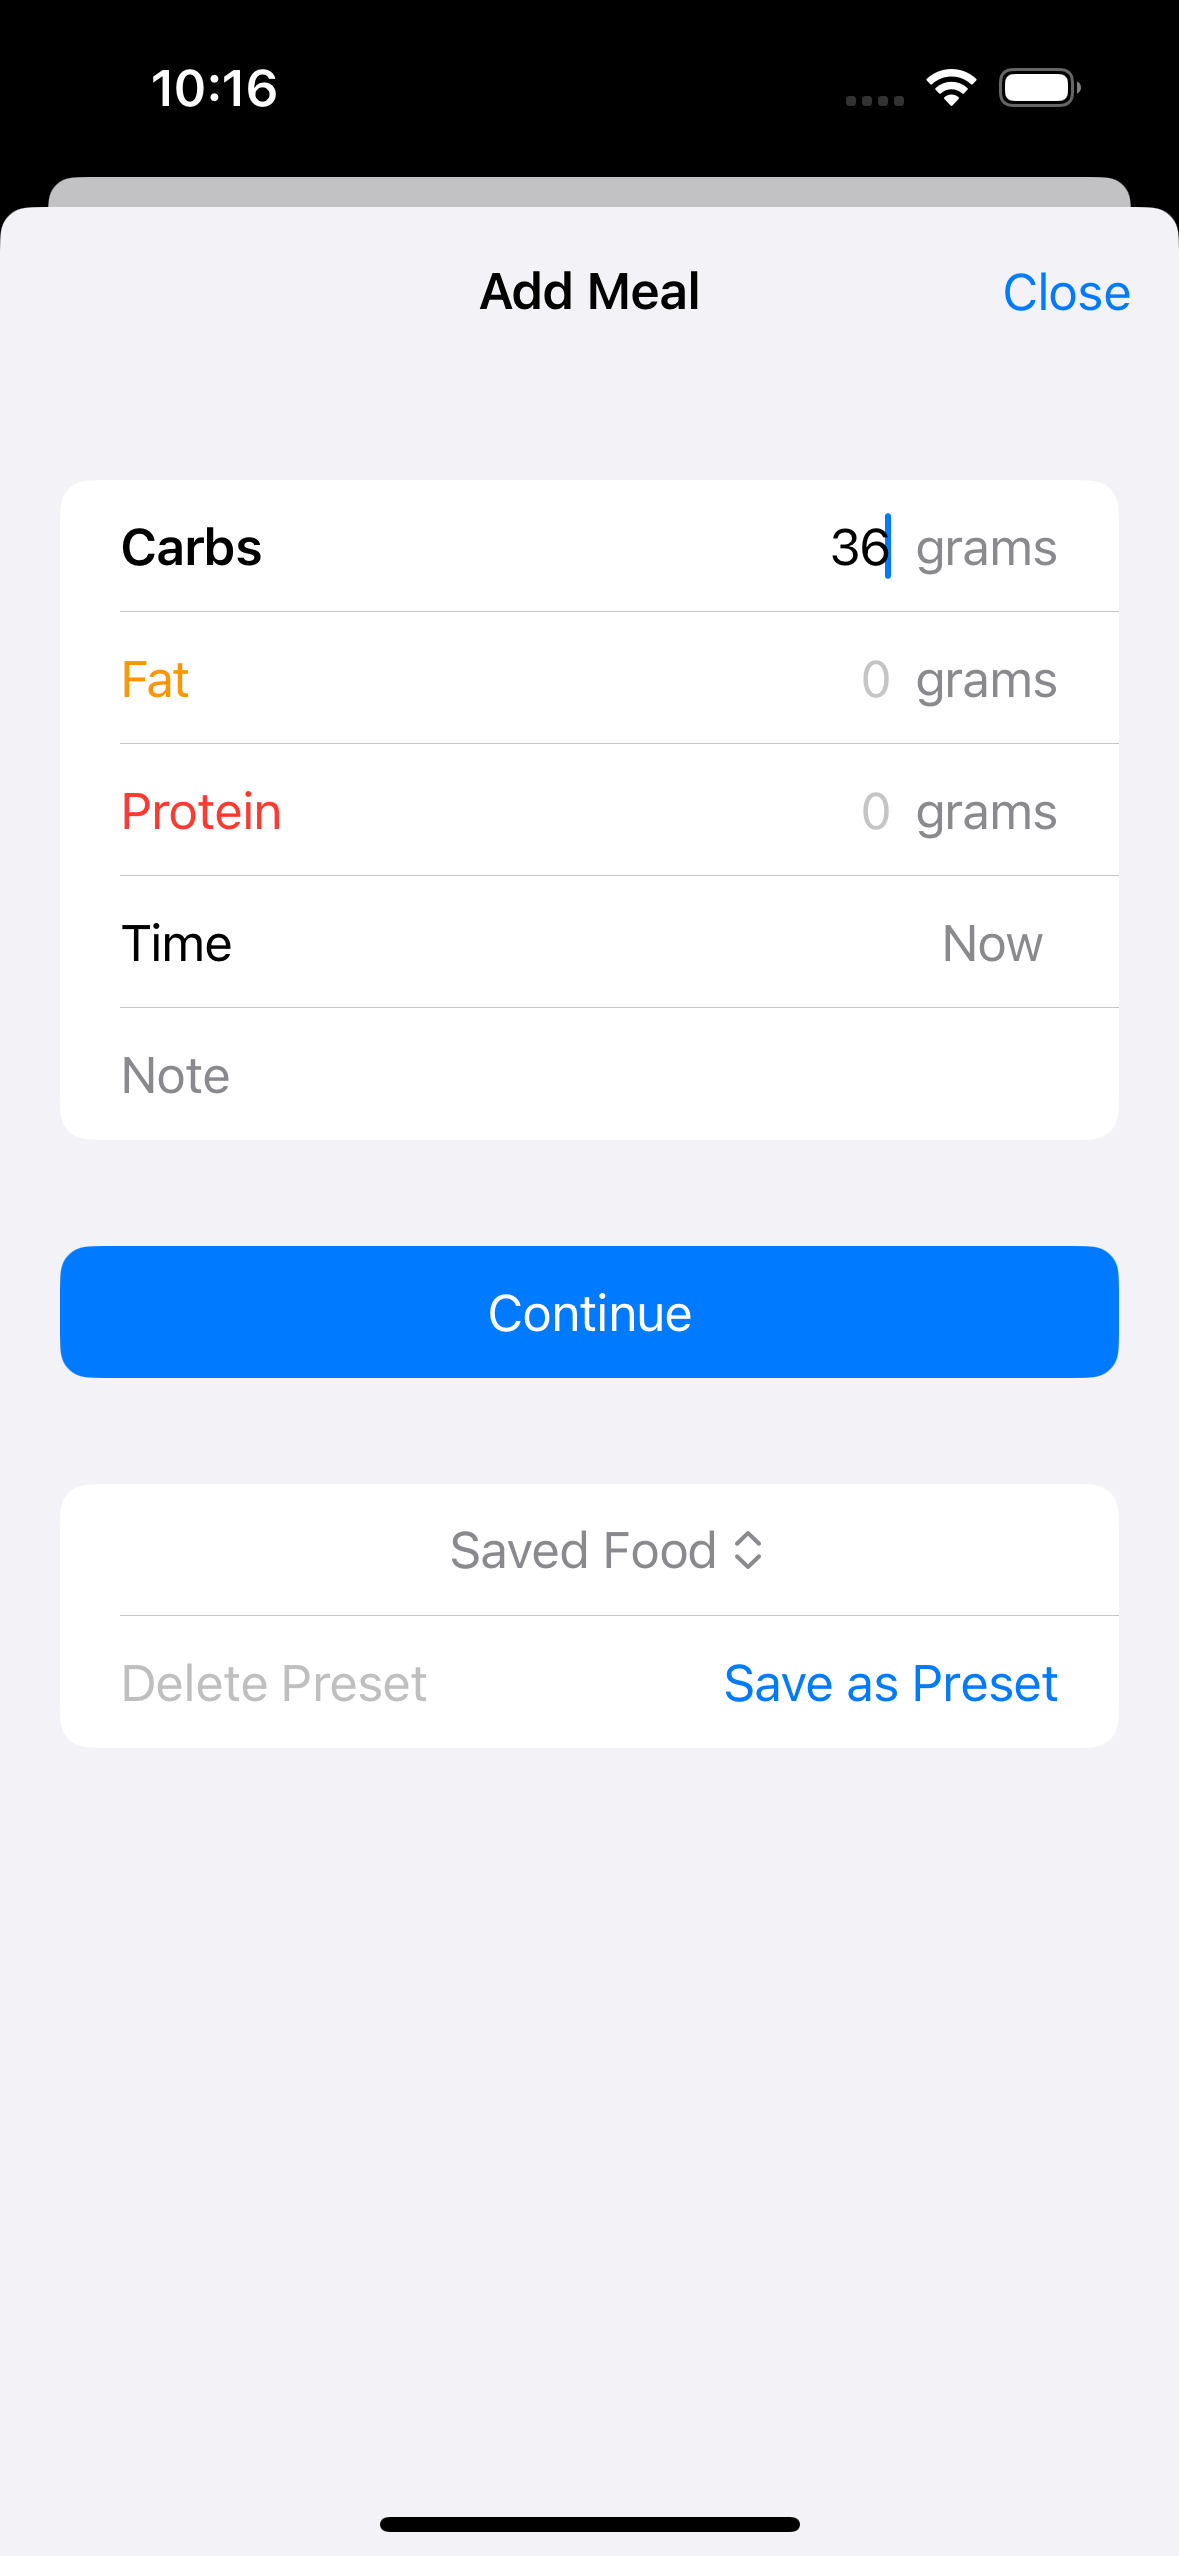
Start by tapping the fork and knife icon. Select a preset meal or enter carbs (and fat and protein if you want). Tap Continue, and the new bolus calculator will open.
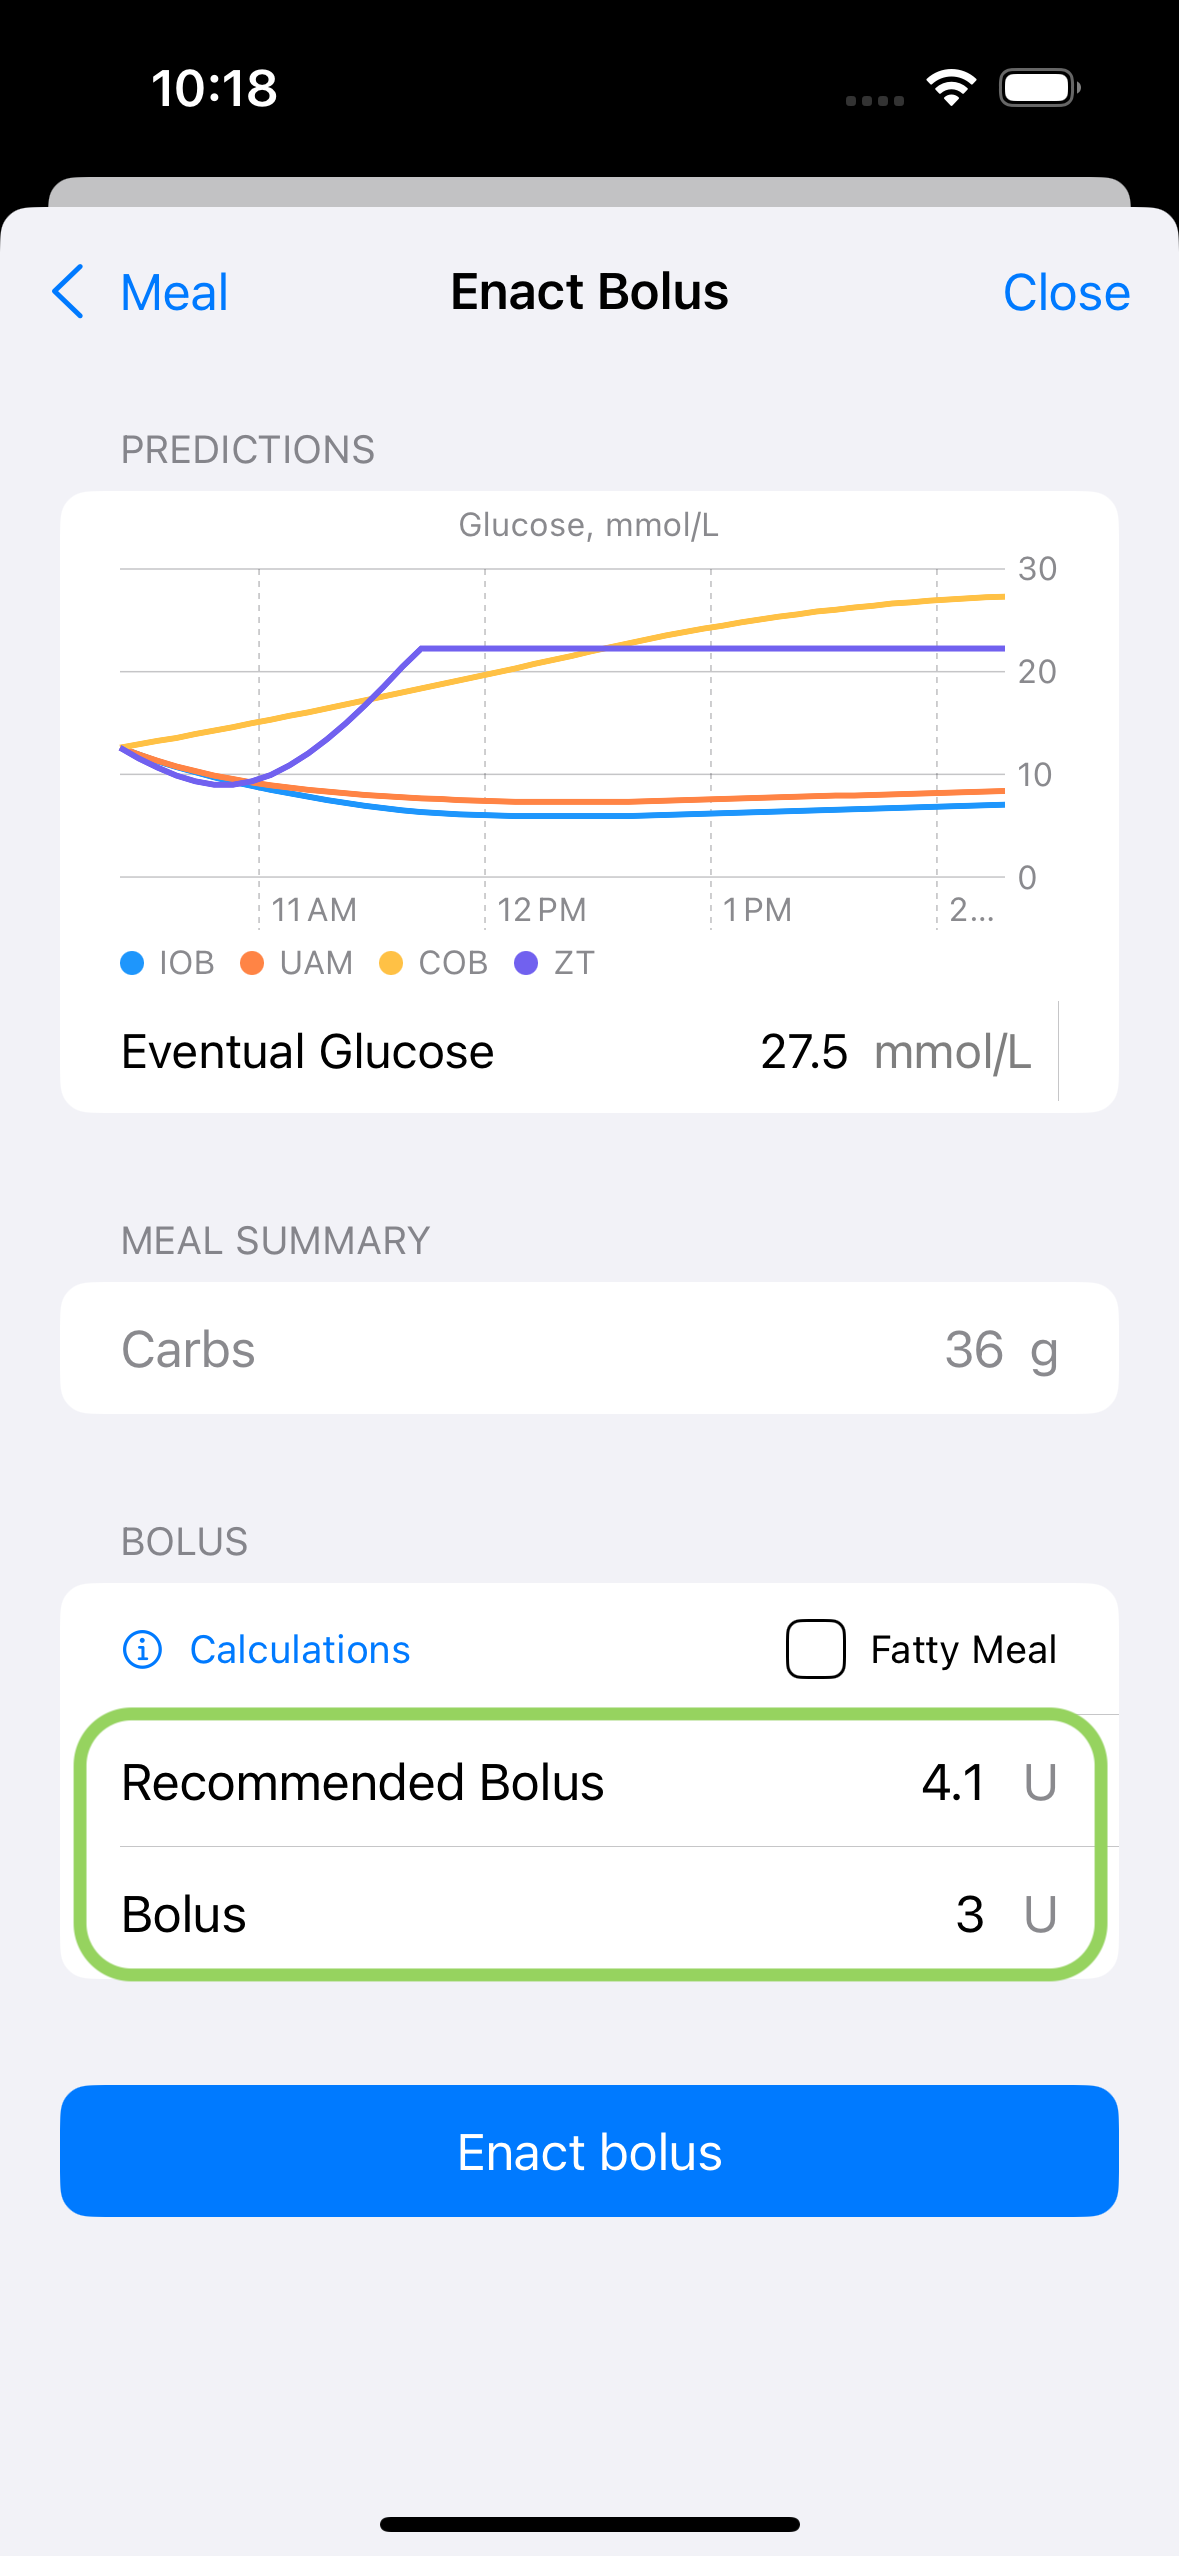
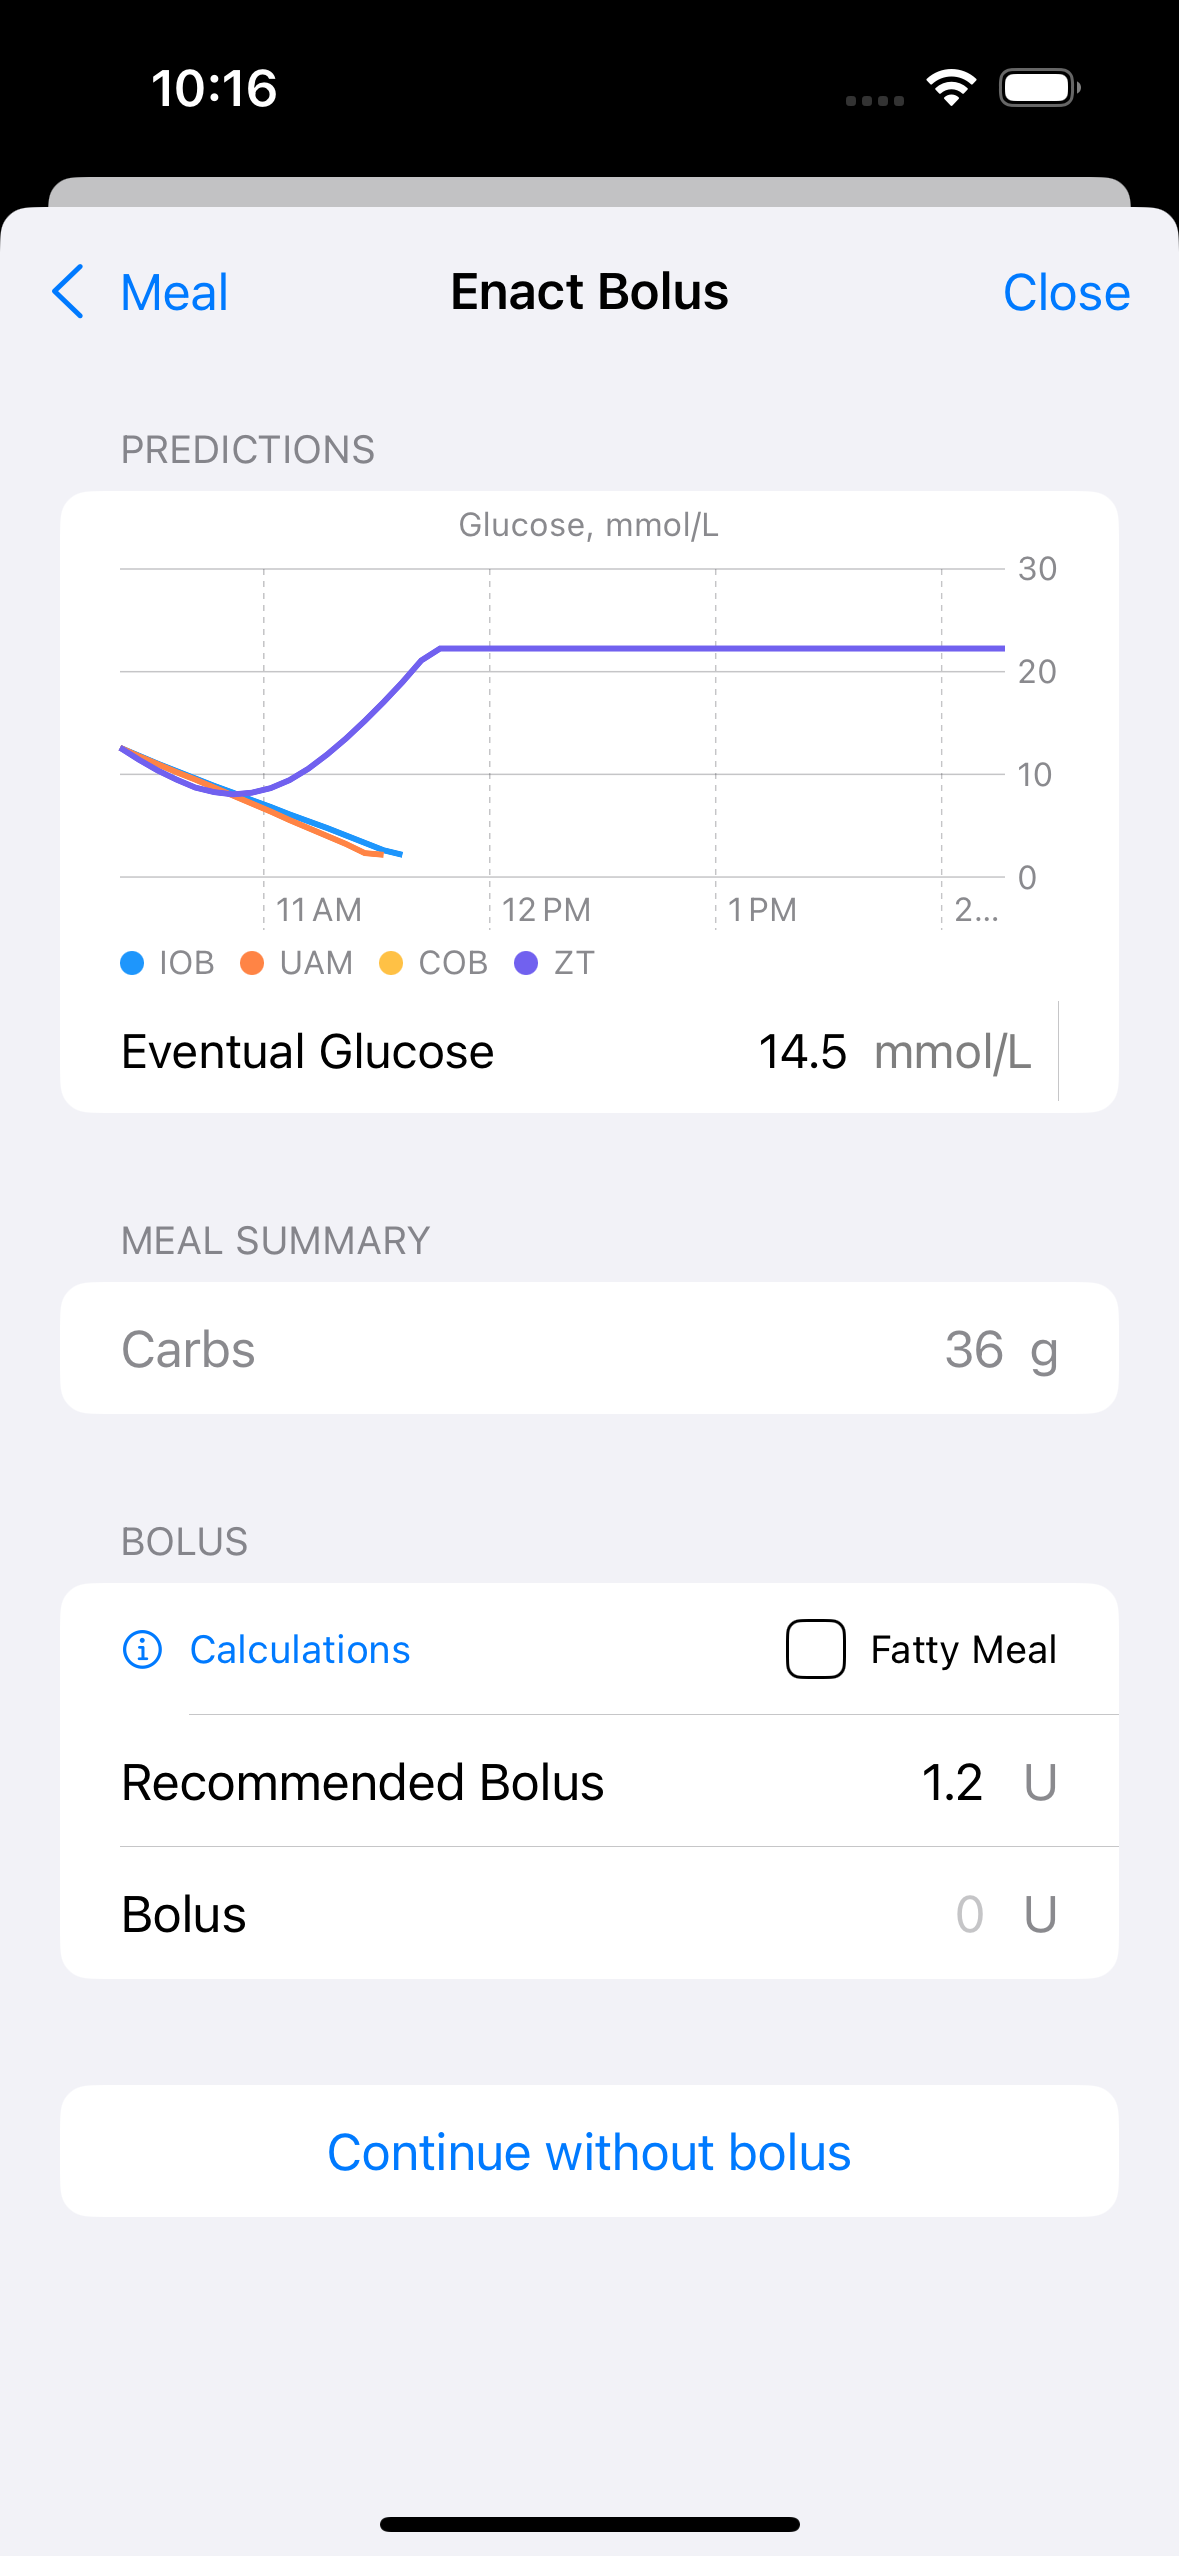
The new bolus calculator will open, and it will show you three things:
Your current prediction lines
A meal summary of the carbs (and fat and protein) you just entered
A bolus recommendation
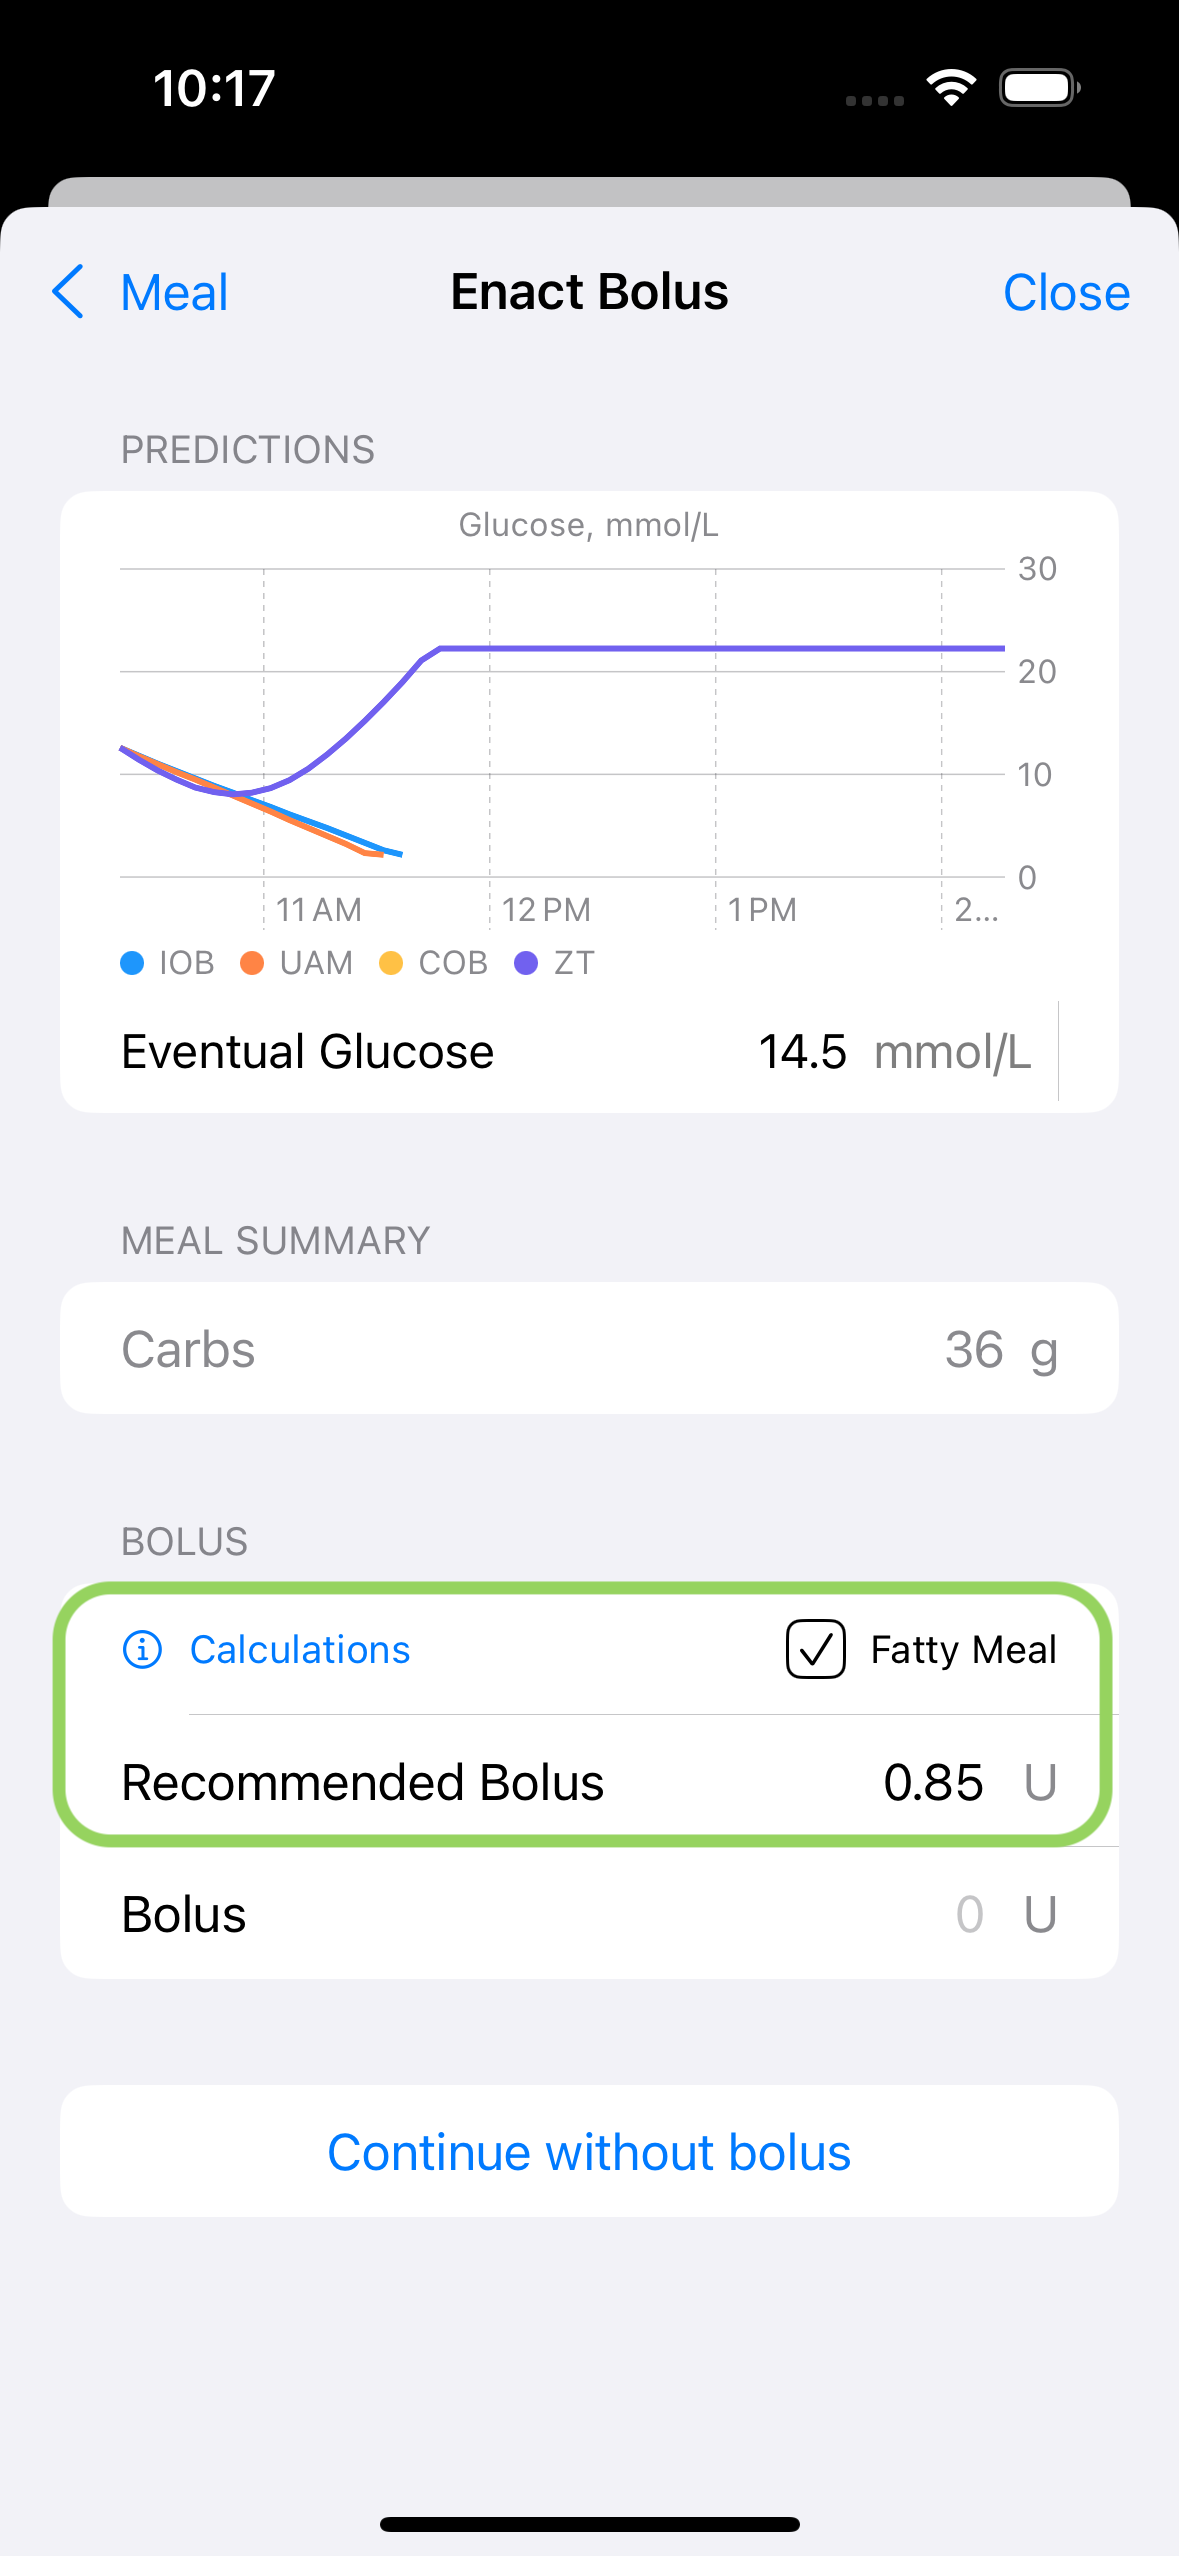
If you tap “Fatty meal,” the bolus recommendation will change according to the override factors you’ve set up in settings.
If you tap “Calculations” you will see how Open-iAPS has come up with the bolus recommendation:
The amount of carbs entered
In the green circle, you will see the relevant profile or dynamic settings: Carb Ratio, ISF, Target Glucose, Basal, and fraction/override.
In the orange circle, you will see the relevant current values: Glucose, IOB, Glucose Trend, and COB. You will also see how each of these values affects the recommendation’s outcome. In this screenshot, the current glucose is a bit high (12.6 mmol/L or 226 mg/dl), which leads to an extra 1.43 Units of insulin in the calculation. The current IOB removes 0.08U, and the BG trend adds 0.17U.
The blue circle shows the calculation result, including the fraction/override you’ve set up in settings.

Tap “OK” to close the calculation pop-up.
Back in the bolus calculator screen, you can now choose the next action:
(Tap “Meal” to go back and edit the meal entry) Not implemented yet.
Tap “Close” to close the calculator. The meal entry will be discarded and deleted, and it will also be removed from Nightscout and Apple Health if you are using those services.
Tap “Continue without bolus” if you want to save the meal entry but don’t want to bolus.
Tap on the “Recommended Bolus” amount to add it to the bolus amount. Finally, tap “Enact Bolus.”
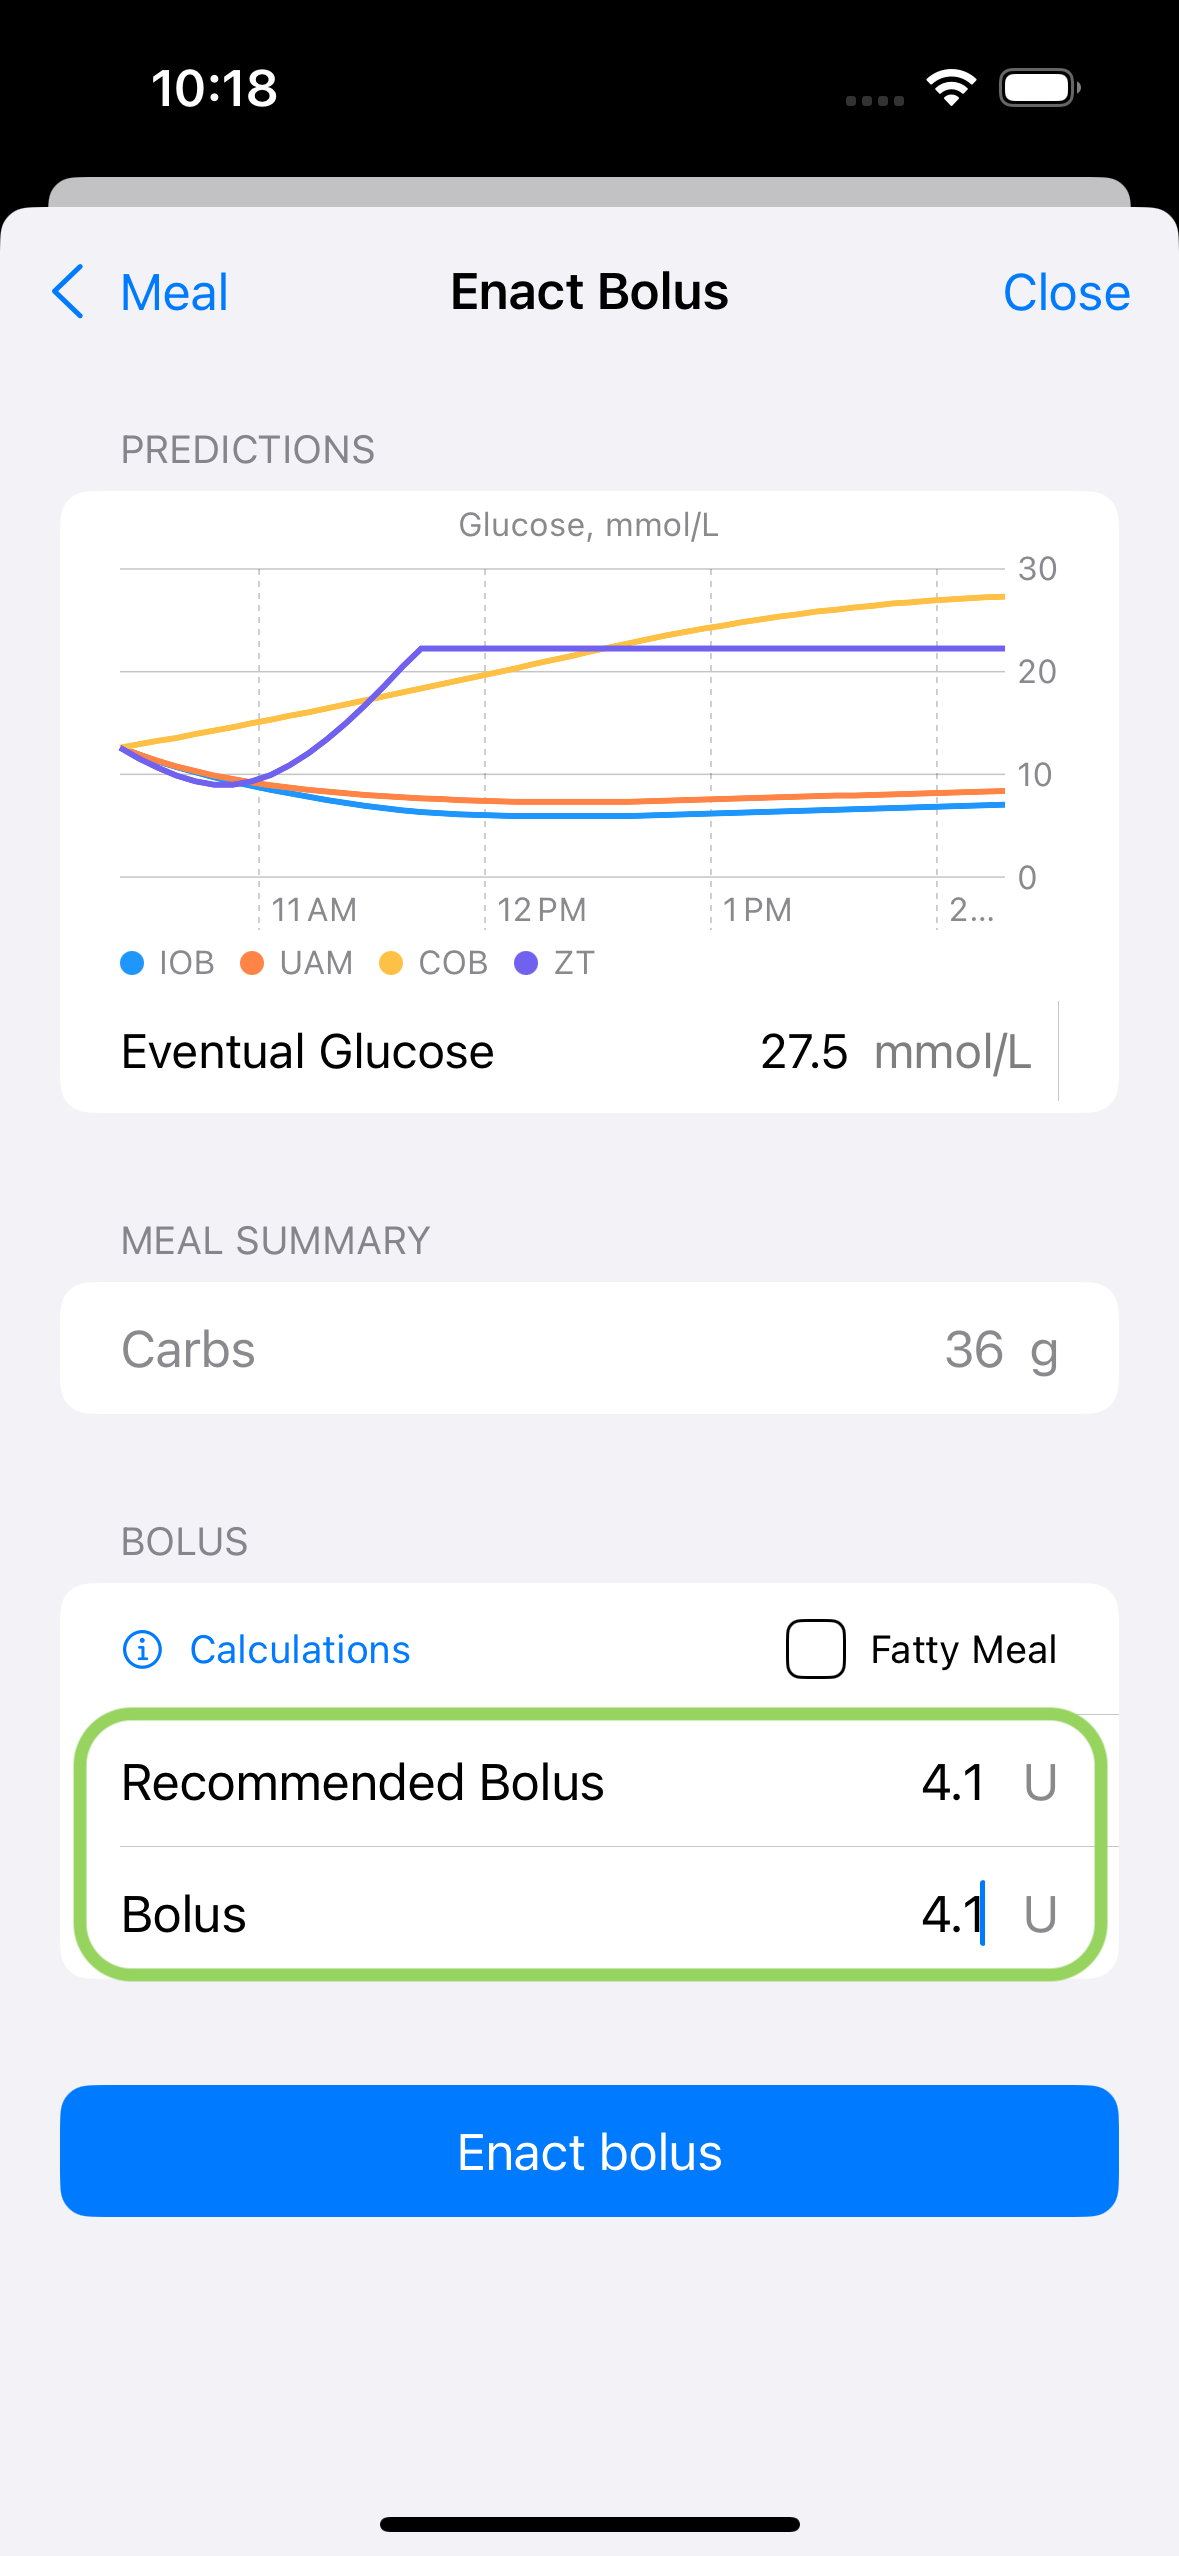
If you want to override the bolus amount manually, you can tap “Bolus” to change it. Only the amount in the “Bolus” field will be enacted.